Are your granite countertops looking dull and lackluster? Do you want to bring back their natural beauty and protect them for years to come?
In this guide, I will walk you through the process of stripping and resealing your granite countertops to restore their shine and enhance their longevity.
With a few simple steps and the right materials, you can transform your countertops and enjoy a stunning and durable surface in your kitchen.
Can You Reseal Granite Countertops Yourself?
If you’re wondering whether you can reseal your granite countertops on your own, the answer is a resounding yes. The process of stripping and resealing granite countertops is not as complicated as it may seem.
With a little time and effort, you can achieve professional-looking results without the need for costly professional help.
However, it’s important to note that proper precautions and techniques should be followed to ensure the best outcome.
Taking the time to understand the process and gather the necessary supplies will set you up for success. So, let’s dive into the step-by-step guide on how to strip and reseal your granite countertops effectively.
What Product to Use to Seal Granite Countertops?
Before we delve into the steps, it’s crucial to know which product you should use to seal your granite countertops. There are various sealers available on the market, but it’s essential to choose a high-quality, penetrating sealer specifically designed for natural stone surfaces like granite.
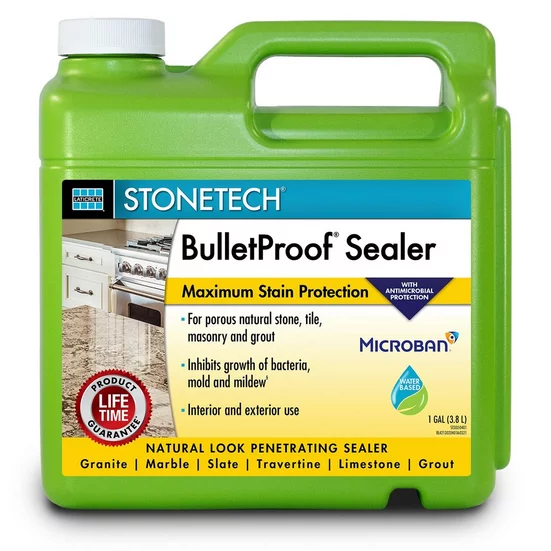
One highly recommended product is the StoneTech BulletProof Sealer. This sealer provides excellent protection against stains and is specially formulated to penetrate deep into the pores of granite countertops. It creates a protective barrier that resists water, oil, and other common household substances, keeping your countertops looking pristine.

Now that we have the necessary information let’s jump into the step-by-step process of stripping and resealing your granite countertops.
How to Strip and Reseal Granite Countertops
Step 1: Prepare the countertop
The first step is to prepare the countertop for the stripping process. Start by removing any items from the countertop and thoroughly cleaning it with a gentle granite cleaner. This will remove any surface dirt or debris and ensure a clean surface for the stripping and resealing process.
Step 2: Strip the existing sealer
To remove the existing sealer from your granite countertops, you’ll need a granite stripper. Apply the stripper to the countertop according to the manufacturer’s instructions. Allow it to sit for the recommended time to penetrate the sealer and loosen it from the surface.
Using a plastic scraper or putty knife, gently scrape off the stripper and the old sealer. Be careful not to scratch the surface of the granite. If needed, repeat this step until all the sealer has been removed.
Step 3: Clean the countertop
Once the old sealer has been stripped away, it’s important to clean the countertop to remove any residue thoroughly. Use a granite cleaner and a non-abrasive sponge or cloth to wipe down the surface. Rinse with clean water and dry with a lint-free towel.
Step 4: Test for absorption
Before applying the new sealer, it’s essential to test the granite countertop’s absorbency. This test will determine if the surface is ready to be sealed. Sprinkle a few drops of water onto the countertop and observe if it beads up or absorbs into the stone. If the water beads up, this indicates that the surface is still adequately sealed. If the water absorbs, proceed to the next step.
Step 5: Apply the new sealer
Now it’s time to apply the new sealer to your granite countertops. Using a clean, lint-free cloth or applicator pad, apply the sealer in a thin, even layer across the surface. Be sure to follow the manufacturer’s instructions regarding application and drying times.
Allow the sealer to penetrate the granite for the recommended amount of time. This will ensure that the sealer effectively seals the pores and provides maximum protection. After the designated time has elapsed, wipe away any excess sealer with a clean cloth.
Step 6: Let the sealer cure
After applying the new sealer, it’s essential to allow it to cure properly. This process typically takes 24 to 48 hours, during which time the countertop should not be used or exposed to moisture. Avoid placing any items or preparing food on the countertop until the sealer has fully cured.
Step 7: Regular maintenance
To keep your newly sealed granite countertops looking their best, regular maintenance is key. Clean up spills promptly using a mild granite cleaner, and avoid using harsh chemicals or abrasive scouring pads. Wipe down the countertop regularly with a soft cloth or sponge to remove any dirt or debris.
Conclusion
Stripping and resealing granite countertops is a simple and effective way to rejuvenate their appearance and protect them for years to come. By following these step-by-step instructions and using a high-quality sealer, you can achieve professional results without the need for professional help.
Have you stripped and resealed your granite countertops before? Share your experience and any helpful tips in the comments below.
